Zoom User Guide
This guide will cover the basic connections and setting required to use your
ELMO Document Camera with Zoom. This guide is divided into two sections. Section 1 is for newer cameras, and section 2 is for older cameras. If your ELMO is not listed in section 1, please skip down to section 2.
Section 1
Section 1

ONLY FOR MODELS - OX-1 / MX-1 / MX-P / MX-P2 / MX-P3 / PX-10 / PX-10E / PX-30 / PX-30E / TT-12iD / TT-12W / TT-12F / TT-L1 / TT-X1 / MO-1 / MO-1w / MO-2 / MA-1
See section 2 for older cameras
See section 2 for older cameras
1. Connect the document camera to your computer using an appropriate
USB cable.
2. Log in to your Zoom account.
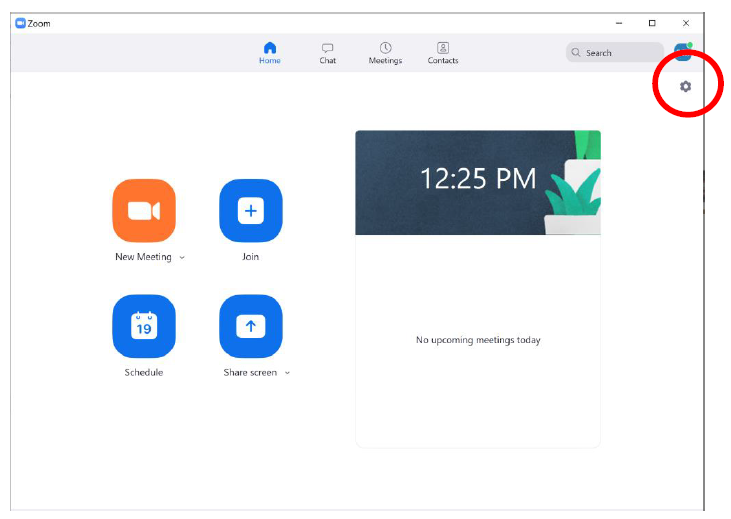
3. Located the Settings icon in the upper right corner of the window.
4. Click on the Video menu in the left margin. You can now choose
from available cameras.
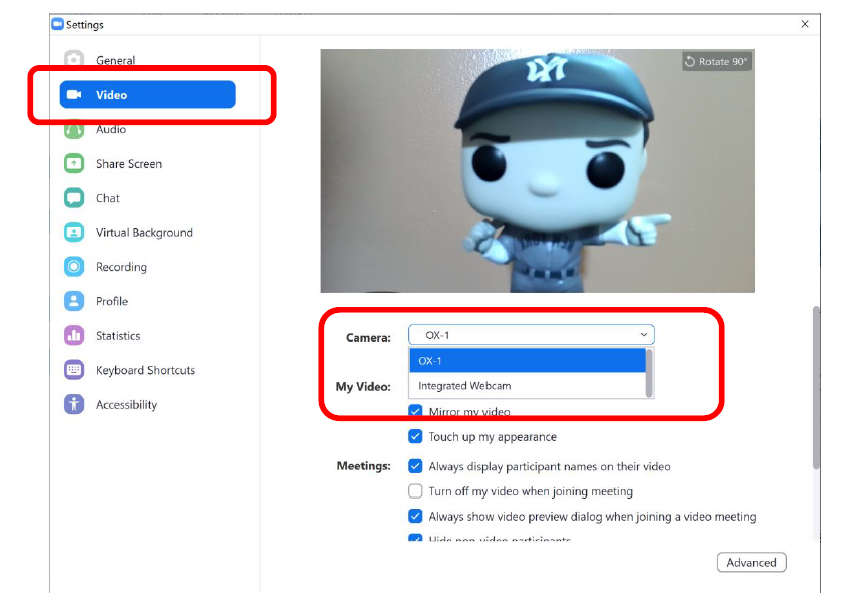
5. If you’re using a document with images or text it may appear mirrored
to you. You can adjust this setting by unchecking the option box. It
will be correct to your audience regardless.
6. There are different options for presenting using Zoom.
a. You can choose to show your webcam or the document camera by choosing in the camera tools menu.
b. Your audience can see both you and the content you’re sharing
with the document camera. Click on Share icon, Select the
Advanced tab then select Content from 2nd Camera.
Section 2
Older cameras will require you to download software (Image Mate 3 or ELMO Interactive Toolbox) and use Zoom's Share Screen feature. Click the Share icon and choose the ELMO software window showing your content.
Related Articles
Microsoft Teams User Guide
This guide will cover the basic connections and setting required to use your ELMO Document Camera with Microsoft Teams. This guide is divided into two sections. Section 1 is for newer cameras, and section 2 is for older cameras. If your ELMO is not ...Google Meets / Google Classroom User Guide
This guide will cover the basic connections and setting required to use your ELMO Document Camera with Google Meets / Classroom. This guide is divided into two sections. Section 1 is for newer cameras, and section 2 is for older cameras. If your ELMO ...ELMO Interactive Toolbox Manual
Download the EIT user manual below:M1 and M2 Mac Notice - Frozen Mouse / Black Screen Issue
This guide will show you how to fix the compatibility issues with ELMO Interactive Toolbox and Apple M1 /M2 computers. Please note that this guide assumes you have already installed and tested ELMO Interactive Toolbox on your computer. For help ...